Sitemap Generator Script
for just: $49.99
Latest Script version: v8.2
* The script is for personal use only and is not intended for commercial use or to be resold as a service
(paid or free).
License agreement
Once you have purchased our unlimited PHP sitemap generator script you will receive your own individual download link for the file by email.
Click on the link and you will be presented with a screen similar to the picture below:
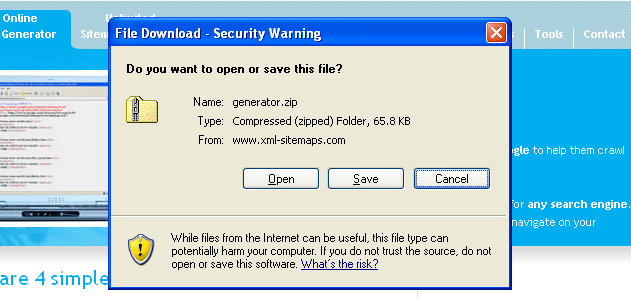
Click save and save the file to your PC.
Select "Open" and you will see the following:
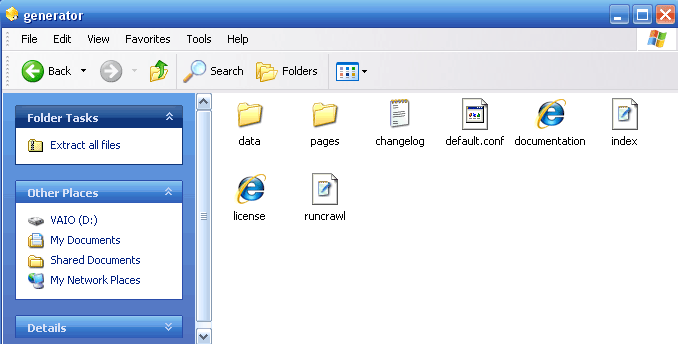
Select "Extract all files"
Now that you have the extracted files on your PC you need to upload them to your website. In this example we are going to use Filezilla, a popular free FTP program which can be downloaded here.
Open Filezilla
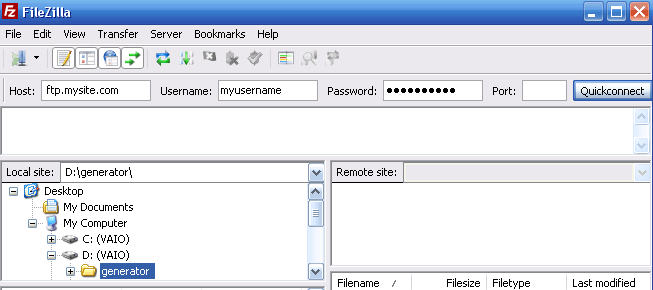
and enter your ftp login details: Host, Username and Password. Click the 'Quickconnect' button or hit enter on your keyboard and you will be connected to your site.
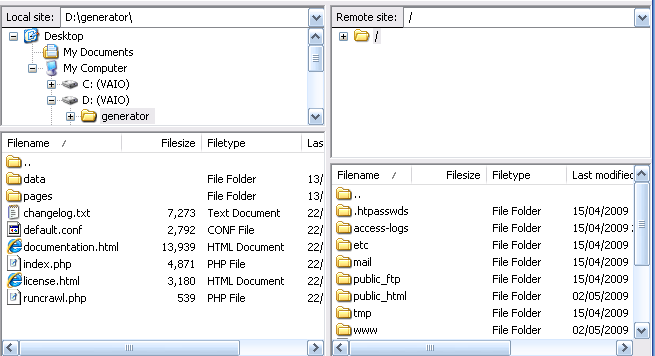
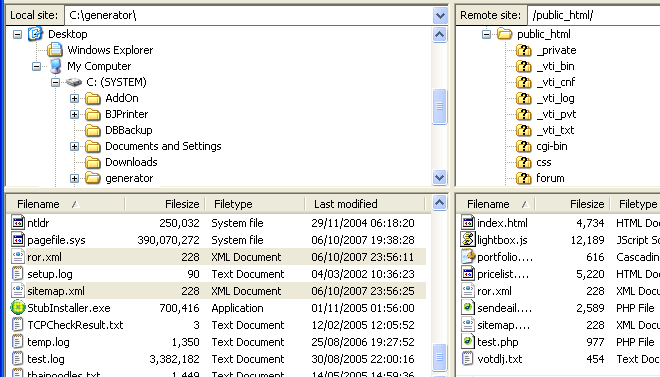
On the right hand side you can see your website's file structure. We need to install the script into your root folder which is often referred to as public_html (or www, htdocs, etc.)
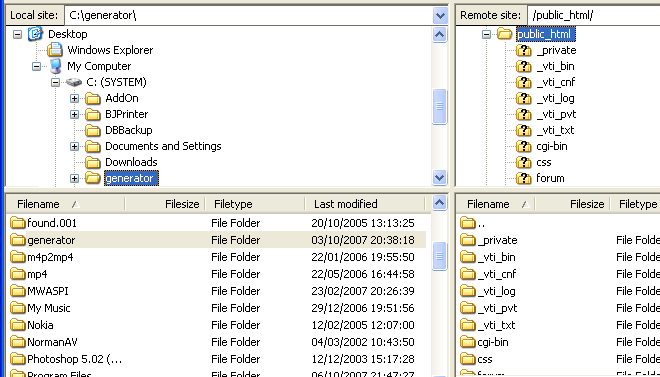
Now we are in the public_html directory you simply need select the generator folder in the left hand screen with your mouse and drag it over to the window on the right. Filezilla will then copy all of the files to your website.
Once uploaded you will now see the generator folder on the right hand side of the screen.
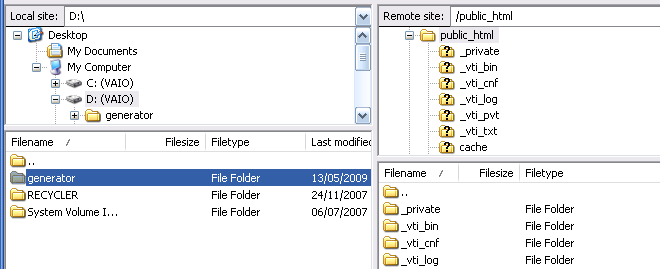
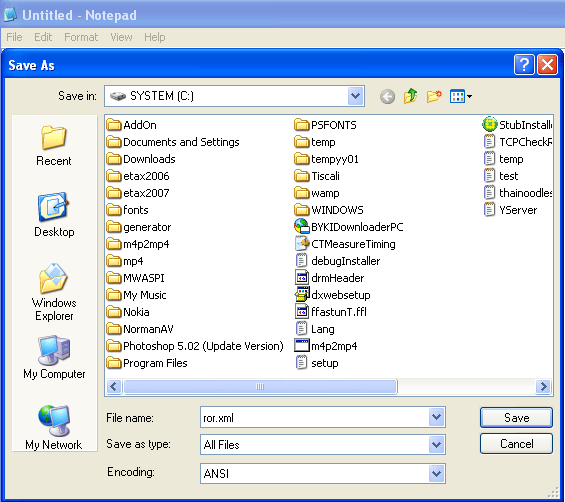
You will need to create two new blank xml files - sitemap.xml and ror.xml. An easy way to create these files is to use 'Notepad' (Start > Accessories > Notepad). In the File menu click 'Save As...' Choose 'All Files' and type in the name sitemap.xml as below. Repeat this process for ror.xml
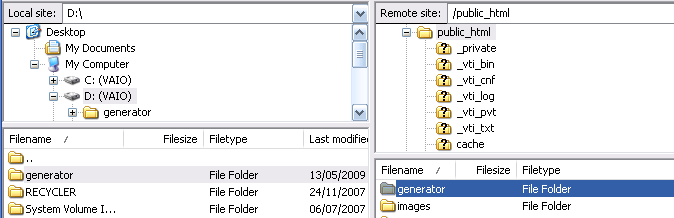
Now you need to upload ror.xml and sitemap.xml files to the root directory by dragging the files over
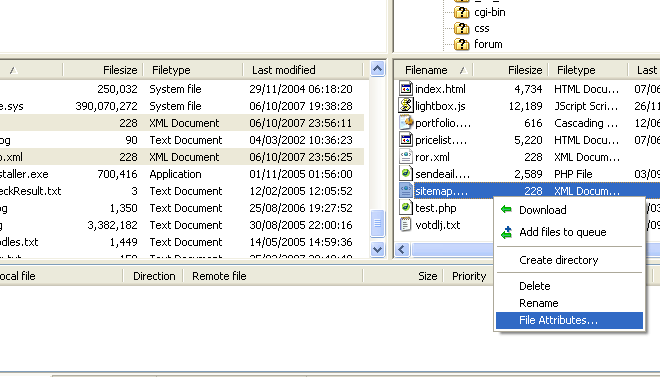
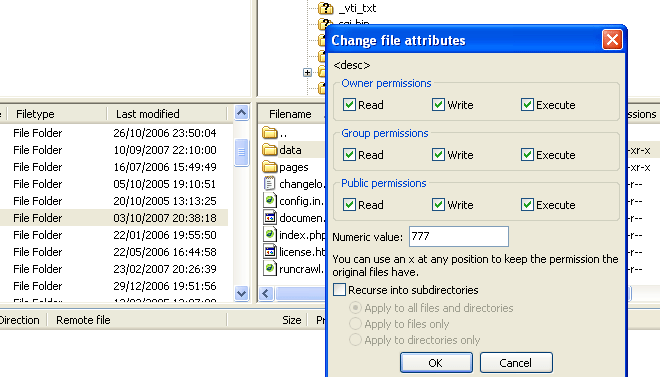
We now need to set file permissions for the ror.xml and sitemap.xml files so that the script can write to them once it has run. To do this highlight sitemap.xml on the right hand side screen and then right click your mouse. You will be presented with a popup screen. Move your mouse down to File Attributes and select it.
You will then be given the options to change file permissions:
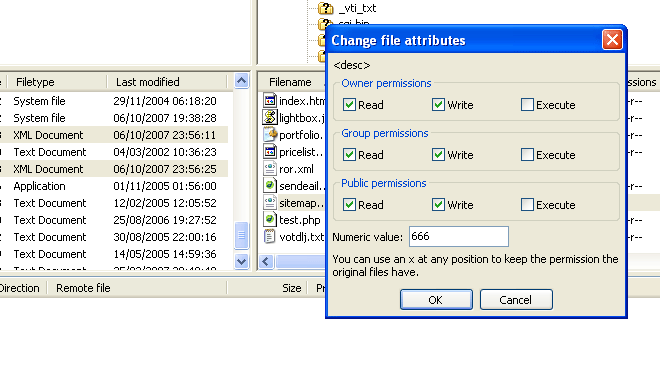
You can contact your system administrator for specific permissions value to use on your server, in this example in the Numeric value box we type 666 and then click OK. Repeat this step with the ror.xml file and set permissions to 666.
If you are creating images, news or video sitemaps you will also need to create the following blank files and set 0666 permissions as instructed above:
sitemap_images.xml, sitemap_news.xml, sitemap_video.xml.
Once done we need to set permissions for the data folder to make it writable. You can contact your system administrator for specific permissions value to use on your server, we are using 777 here.
Note: in case of Windows/IIS servers it is not allowed to set permissions via FTP and you will have to that using Hosting Control Panel.
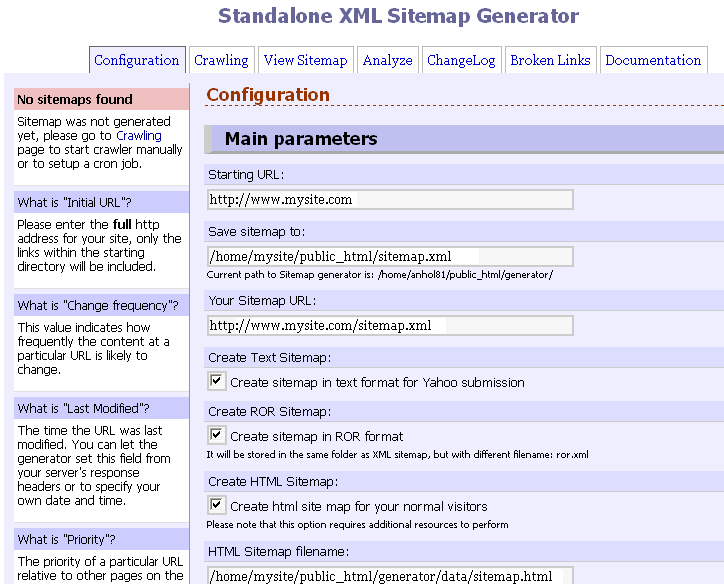
To access your sitemap generator enter your website address (www.mysite.com/generator) and follow the on screen instructions.